Table Of Content
To some, a barrel with old tires on it might be an eye sore, so if that’s you, this isn’t the compost bin for you. If you have any extra of these supplies on hand though, this is a clever way to create an easily move-able compost bin. 2 - Measure out a square or rectangular area for your compost bin. It can be any size, but 3x3 or 4x4 feet is a good size for beginners.
Composting 101: Backyard and Worm Composting
Compost can be made up of almost everything you throw away in your kitchen. Fruit scraps, vegetable waste, paper napkins and even coffee grounds can make for a suitable compost fertilizer, according to the Environmental Protection Agency. Smart gardening is an easy way to get a great looking yard while helping to keep the County a nice place to live.
The 8 Best Compost Bins of 2024, According to Testing - Better Homes & Gardens
The 8 Best Compost Bins of 2024, According to Testing.
Posted: Fri, 16 Feb 2024 08:00:00 GMT [source]
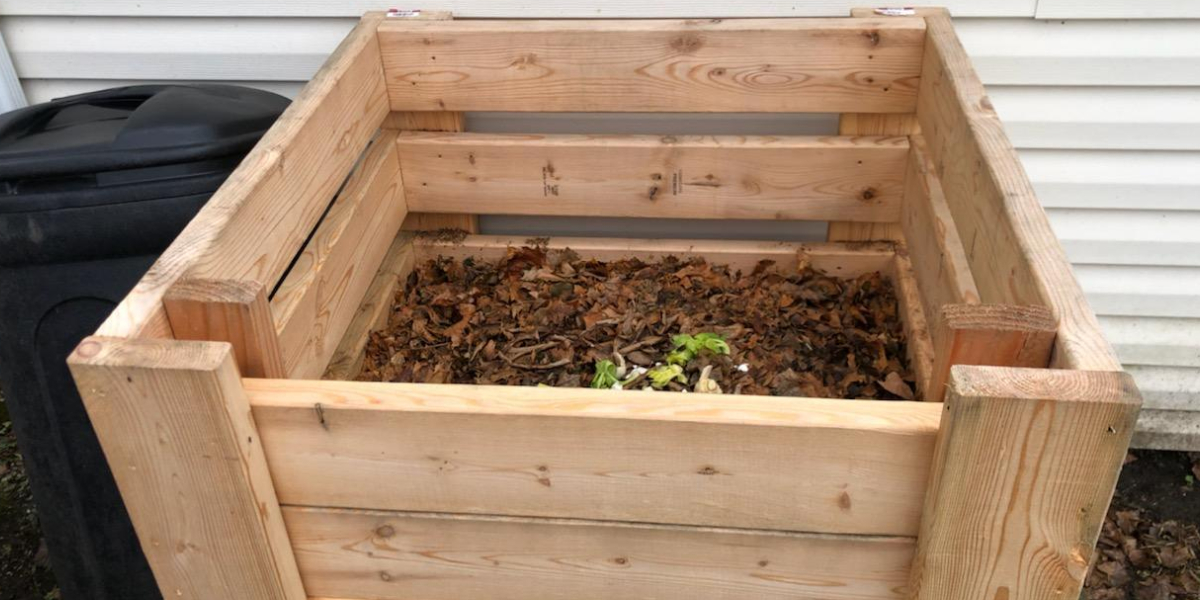
How Compost Bins Work and How to Use Them
You can also use staggered plastic bins which you stock with worms, feeding them throughout the entire compost process. Perforations in this case are on the lids of the containers, and the entire system is closed and above ground. Ideally, you should be able to bring the bins indoors when temperatures get too high or low for your worms. The way it works is that food scraps are always added to the bin on the left. Next to the Add-to-Pile bin I keep a round wire bin (our old wire bin!) filled with leaves. When adding food scraps, I cover them with handfuls of leaves.
Easy Recycled Compost Barrel
Tip the bin backwards so it’s resting on its back boards. Using your staple gun, staple hardware cloth across the entire bottom of the bin. Be sure to put staples every 3″ or 4″ to make sure it’s held on well and no critters can burrow in between the staples. When you compost outdoors, you’re going to have to deal with the elements.
Worm Composting

So a few years back, we set about creating what we hoped would be both a functional and attractive set of composting bins. Place a bin with bottom pieces on soil and slide four removable planks into each bin to evenly space front supports. Our piece of polycarbonate was not actually 3′ wide, so we had to layer two pieces next to each other. We overlaid two pieces so that the corrugations fit nicely together, and used clear silicone sealant to hold the pieces together.
Look around your homestead environment, I'm sure you have what it needs to create this simple DIY willow composter. Made out of branch cuttings from bushes or trees, easily weave them together to create this wonderful bin. Learning this skill could make a huge difference around your garden.
A pile that is at least 3′ wide, 3′ high and 3′ deep creates the optimum mass needed for fast decomposition. And, at that size, the pile is still manageable to turn and mix with ease. When it comes to powering our plants, compost really is the star of the show. Attach the bottom pieces, being careful to screw into the side slats.
Recipe for Home Composting
One way to DIY your vermicomposter is to build a worm tower, which is a simple design that involves a large PVC pipe where you drill holes to create perforation along its sides. You place your food waste and other worm food, like shredded paper within, and wait for the right type of worms to roll in. Years ago, Mr. TAF completed a Master Composter course, and the three-bin composting system was the holy grail of all compost piles. That’s because the frequent turning helps the contents compost faster, and it’s easy to harvest the finished compost from it.
How Long Until The Compost is Ready
To get started, you can use a few five-gallon buckets to make your own compost bin. You can also buy special indoor bins from hardware and gardening stores or purchase them online. Backyard bins can be bought from the Los Angeles County Department of Public Works for $40 each. Containers without bases give entry to microorganisms and creepy crawlies from the ground below. Some gardeners line the bottom of an open bin with chicken wire to keep rodents out.
A wooden frame holds a 55-gallon food-grade drum horizontally, which was acquired for about $13 from a local soda distributor. A hole saw was used to cut holes into barrel’s top and bottom to enable a PVC pipe to be threaded through horizontally, which acts as the barrel’s spinning axis. The exposed PVC pipe ends are screwed into the barrel’s wooden holder to prevent movement and to assist hand turning.
Smaller piles may struggle to achieve sufficiently high temperatures to kill bad organisms and weed seeds. Larger piles can achieve composting temperatures more easily, but need more frequent turning to ensure proper oxygen supply. A compost bin is like an all-you-can-eat buffet for tiny organisms like bacteria and fungi. They break down the organic materials, absorb what they can, and release good-for-plants nutrients like nitrogen, phosphorus, and magnesium. In addition to keeping unsuitable materials such as food scraps out of the compost bin, making sure it is always closed is key to keep pests out.
Use scissors, a hole-puncher, utility knife, or drill to create aeration holes in the lid. You can store this small bin out of sight in a cabinet or decorate it and keep in on your countertop. Be sure to empty it regularly to reduce odors and fruit fly attraction. Apartment dwellers and urbanites often lament the lack of options for composting in homes with limited yard space or no yard at all. If you’re not the kind to get all squirmy over worms in your house, I highly recommend worm composting as a method for dealing with your kitchen waste. You can buy ready-made worm bins, but if you’re even a little bit handy and have access to a drill then you can make a vermicomposting bin yourself for under $5.
Once the entire bottom is covered, use the wire cutters to snip the hardware cloth free of the roll, flush with the edges of the compost bin. Some people use straw, sawdust, or other types of “brown” material if leaves aren’t available. Whatever material you use, it’s important to cover food scraps to avoid pests and odors, as well as to speed the composting process.
Then we added our wood screws about every 3″ or so around all four edges to hold the polycarbonate in place. Then attach the latch post safety hasps to either side of the door to hold it closed. I attached the “post” part of the hasp to the door frame itself, about 3″ up from the “bottom” of the bin.
The milk crate compost bin is the mini-version of the classic 3-bin design. Essentially, the 3 different crates host compost in different stages of decomposition. The top has newly added materials, which then get moved to the middle crate when partially decomposed, and then finally moved to the bottom when it’s almost ready. This is a very nice and sturdy version of the classic 3-section compost bin. It allows you to have 3 completely separate compost piles in different stages of decomposition. This is one of my favorite compost bin designs because it provides the most capacity for composting.
Straw bales are entirely organic and provide a brilliant way to enclose your kitchen and yard scraps. Possibly the quickest and easiest of all compost set ups, rolls of hardware cloth are cut into 10-foot lengths and formed into an upright tube. If you want to expand the system, plastic totes can be stacked “up” instead of “out”. When the first tote fills up, stack a second plastic tote on top to create a new pile while the lower one keeps breaking the materials down.


No comments:
Post a Comment